Upload large files directly to S3 using Laravel and Uppy
Andréia Bohner • February 13, 2021
upload laravel s3Dealing with large file uploads can be tricky. An optimized solution is to upload directly to Amazon S3 using multipart upload, preventing server overload.
When using AWS SDKs, REST API, or AWS CLI, Amazon S3 allows you upload a file up to 5Gb in a single operation. To upload files larger than 5Gb you must use multipart upload.
If you have already ventured into coding S3 multipart uploads, you probably know that debugging is the most fun part. You can get lost with obscure CORS messages that have nothing to do with CORS at all. You have to analyze every request, header, and the code behind the scenes to get a clue of what is wrong.
I've had the absolute joy of working with a great team on my first Laravel package to simplify this task: Multipart Uploads using Laravel, AWS S3, and Uppy. If you are working with large file uploads to S3, this package will be very handy! It has everything you need to upload, you'll only have to configure few things and you're ready to go.
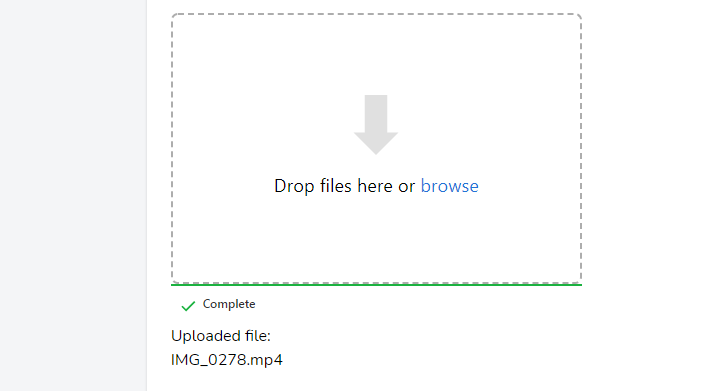
Briefly, the package upload files directly to S3 using multipart upload and returns the URL of the uploaded file. You can pause and abort the upload. It uses the amazing Uppy library for the frontend.
To add the HTML and JS required to get Uppy working it uses a Blade component (<x-input.uppy />).
Alternatively, you can change the template code by publishing the package view or you can create your own template in your app (please see below on "View and JS Configuration").
Let's start!
Installing
Install using Composer
composer require tapp/laravel-uppy-s3-multipart-upload
Add required JS libraries
Add on your package.json file the Uppy JS libraries and AlpineJS library:
    ...
    "devDependencies": {
        "alpinejs": "^2.7.3",
        ...
    },
    "dependencies": {
        "@uppy/aws-s3-multipart": "^1.8.12",
        "@uppy/core": "^1.16.0",
        "@uppy/drag-drop": "^1.4.24",
        "@uppy/status-bar": "^1.9.0",
        ...
    }
    ...
Add in your resources/js/bootstrap.js file:
...

require('@uppy/core/dist/style.min.css')
require('@uppy/drag-drop/dist/style.min.css')
require('@uppy/status-bar/dist/style.min.css')

import Uppy from '@uppy/core'
import DragDrop from '@uppy/drag-drop'
import StatusBar from '@uppy/status-bar'
import AwsS3Multipart from '@uppy/aws-s3-multipart'

window.Uppy = Uppy
window.DragDrop = DragDrop
window.StatusBar = StatusBar
window.AwsS3Multipart = AwsS3Multipart
Add in your resources/js/app.js:
...
require('alpinejs');
Install JS libraries:
$ npm install
$ npm run dev
Publish config file
php artisan vendor:publish --tag=uppy-s3-multipart-upload-config
AWS S3 Setup
The package installs the AWS SDK for PHP and use Laravel's default s3 disk configuration from filesystems.php file.
You just have to add your S3 keys, region, and bucket using the following env vars in your .env file:
AWS_ACCESS_KEY_ID=
AWS_SECRET_ACCESS_KEY=
AWS_DEFAULT_REGION=
AWS_BUCKET=
AWS_URL="https://s3.amazonaws.com"
AWS_POST_END_POINT="https://${AWS_BUCKET}.s3.amazonaws.com/"
To allow direct multipart uploads to your S3 bucket, you need to add some extra configuration on bucket's CORS configuration. On your AWS S3 console, select your bucket. Click on "Permissions" tab. On "CORS configuration" add the following configuration:
[
    {
        "AllowedHeaders": [
            "Authorization",
            "x-amz-date",
            "x-amz-content-sha256",
            "content-type"
        ],
        "AllowedMethods": [
            "PUT",
            "POST",
            "DELETE",
            "GET"
        ],
        "AllowedOrigins": [
            "*"
        ],
        "ExposeHeaders": [
            "ETag"
        ]
    }
]
On AllowedOrigins:
"AllowedOrigins": [
    "*"
]
You should list the URLs allowed, e.g.:
"AllowedOrigins": [
    "https://example.com"
]
Using
To begin uploading files, simply add a hidden field that will receive the S3 URL of the uploaded file, and the uppy blade component to your form in your view file:
<input type="hidden" name="file" id="file" />
<x-input.uppy />
Now you're ready to start uploading big files directly to S3!

Let's break it down
You can also configure it to best suit your needs:
S3 Configuration
On the package configuration file (/config/uppy-s3-multipart-upload.php), you can setup:
s3.bucket.folder - the folder to store the uploaded files in your bucket
s3.presigned_url.expiry_time - the expiration time of the presigned URLs used to upload the parts
return [
    's3' => [
        'bucket' => [
            /*
             * Folder on bucket to save the file
             */
            'folder' => 'videos',
        ],
        'presigned_url' => [
            /*
             * Expiration time of the presigned URLs
             */
            'expiry_time' => '+30 minutes',
        ],
    ],
];
View and JS Configuration
Customizing the uppy component
Passing data
You can configure the uppy component by passing data to it:
Changing the HTML and JS
First, publish it to your project with:
php artisan vendor:publish --tag=uppy-s3-multipart-upload-views
Copied Directory [/vendor/tapp/laravel-uppy-s3-multipart-upload/resources/views]
To [/resources/views/vendor/uppy-s3-multipart-upload]
Publishing complete.
Now you can change the /resources/views/vendor/uppy-s3-multipart-upload/components/input/uppy.blade.php file.
Rewriting the view
You can write your own view and JS. The only required part is the Uppy's AwsS3Multipart as follows:
    Uppy
      .use(AwsS3Multipart, {
          companionUrl: '/',
          companionHeaders:
          {
              'X-CSRF-TOKEN': window.csrfToken,
          },
      })
Sample App
Here's a sample Laravel app to demonstrate the package usage.
That's all folks!
This is the pre-release of the package and it has more features to add :)
I would really love to hear your feedback!